
From Lucy Quach, GearLaunch Marketing Manager
Are you ready to take your print-on-demand business to the next level? If you've been struggling with design placement, wondering why your products don't look as polished as the competition, or simply want to streamline your creation process, then GearLaunch's design templates are your secret weapon.
After helping thousands of sellers launch successful campaigns, I've seen firsthand how the right approach to design templates can transform a struggling store into a profitable business. Today, I'm sharing everything you need to know about using our design templates to create stunning all-over print products that sell.
Think of design templates as your professional design assistant. They eliminate guesswork, reduce production errors, and ensure your products look consistently amazing. Here's what makes them so powerful:
Precision Placement: Every element is positioned exactly where it should be for optimal printing results.
Professional Standards: Templates follow industry best practices for print production.
Time Efficiency: Cut your design time in half while improving quality.
Reduced Errors: Built-in guidelines prevent costly mistakes that could hurt your brand reputation.
Before we dive into the creation process, you need to download the correct design template for your chosen product. This is crucial - using the wrong template is like trying to fit a square peg in a round hole.
Where to Find Templates: Download the correct product design template as provided by GearLaunch.
File Format: Templates are designed to work with Photoshop.
Product-Specific: Each product has its own unique template designed for optimal results.
Open your downloaded template in Photoshop. You'll immediately notice several key elements:
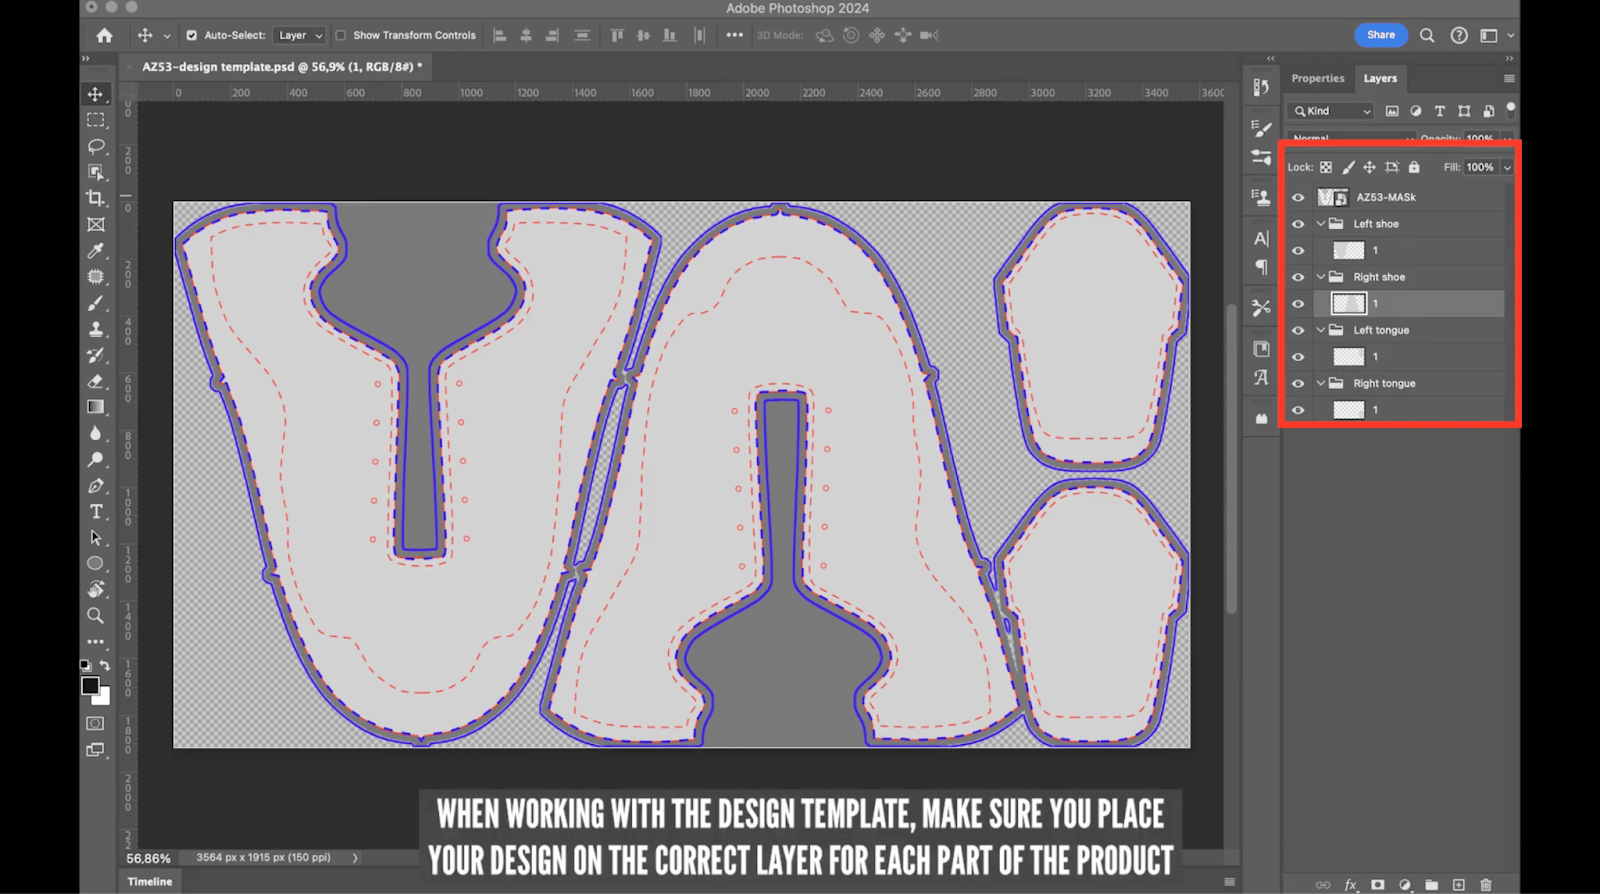
Pro Insight: Before you start designing, spend a few minutes familiarizing yourself with the layer structure. Understanding how each layer corresponds to different parts of your product will save you hours of frustration later.
This is where many sellers make critical mistakes that cost them sales. Here's how to get it right:
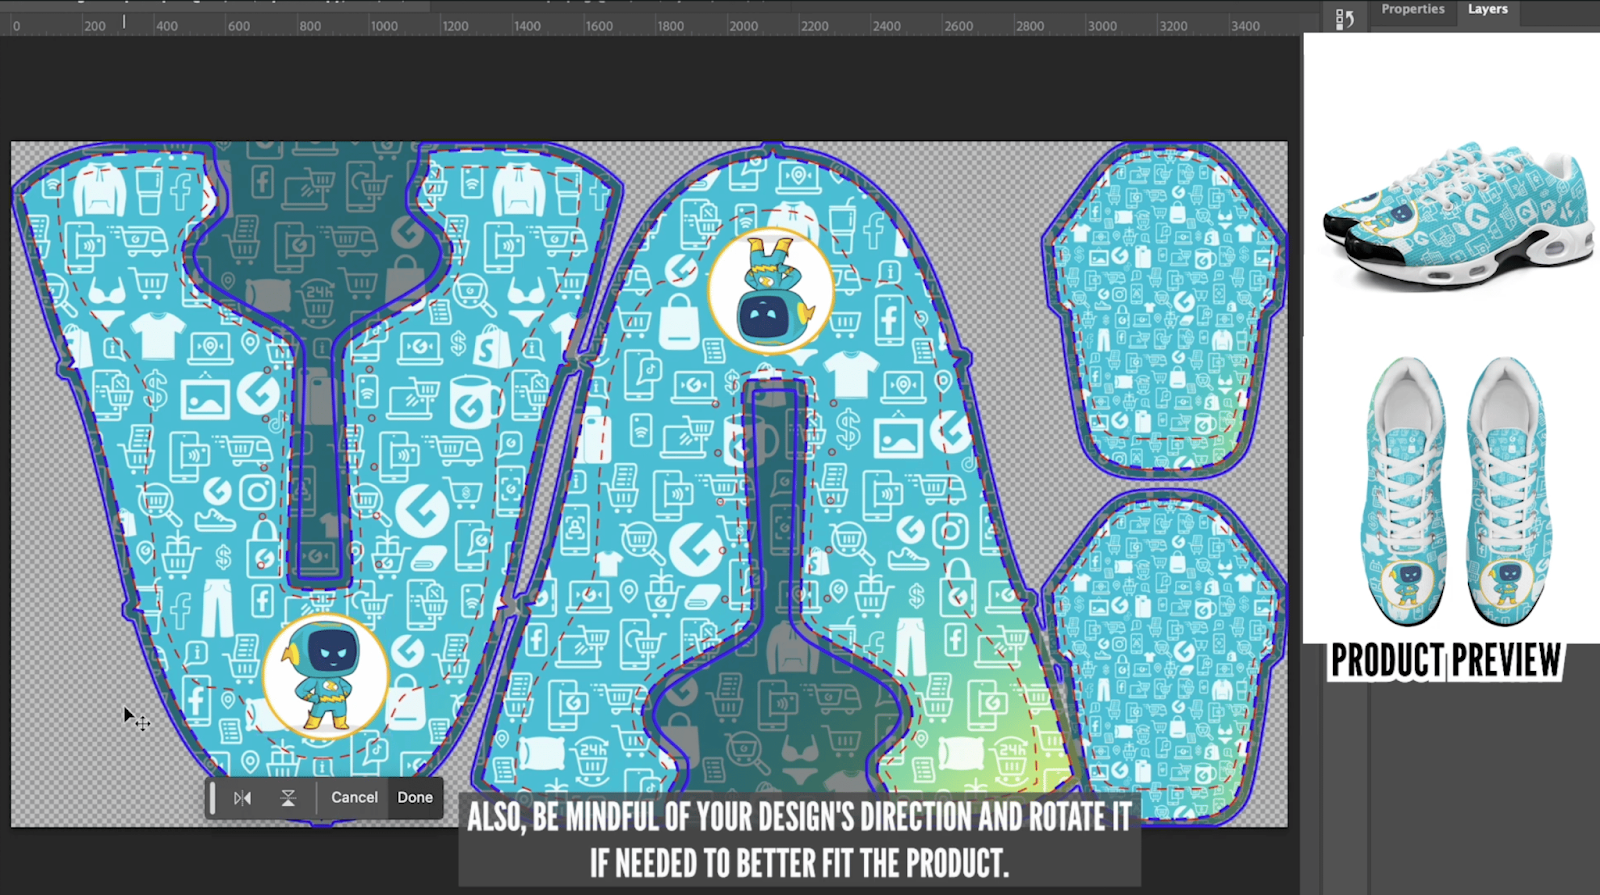
The Golden Rule: Always place your design elements on the correct layer for each product part. Mixing up layers leads to misaligned prints and unhappy customers.
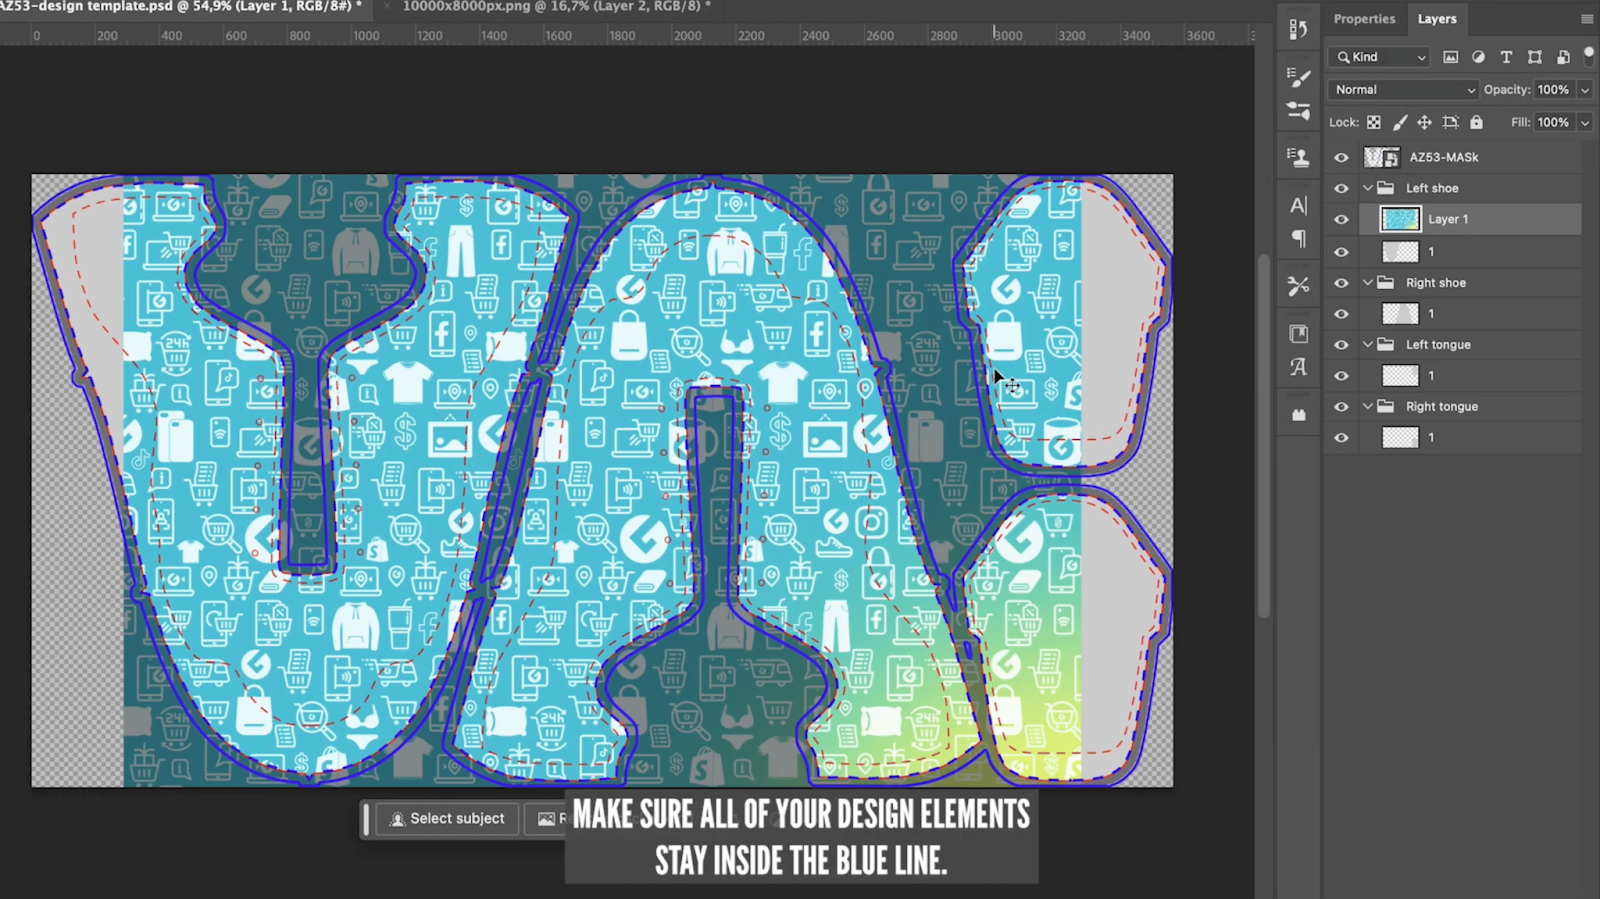
Boundary Respect: Keep ALL design elements inside the blue guidelines. Going outside these boundaries means parts of your design won't print, creating an unprofessional look.
Safe Zone Strategy: Place your most important elements (logos, text, key graphics) within the red dashed safe zone. This ensures they won't get cropped during production or folded out of view when worn.
Masking for Polish: Don't skip the masking step! It creates clean, professional edges that separate amateur designs from professional ones. Your customers will notice the difference, even if they can't articulate why.
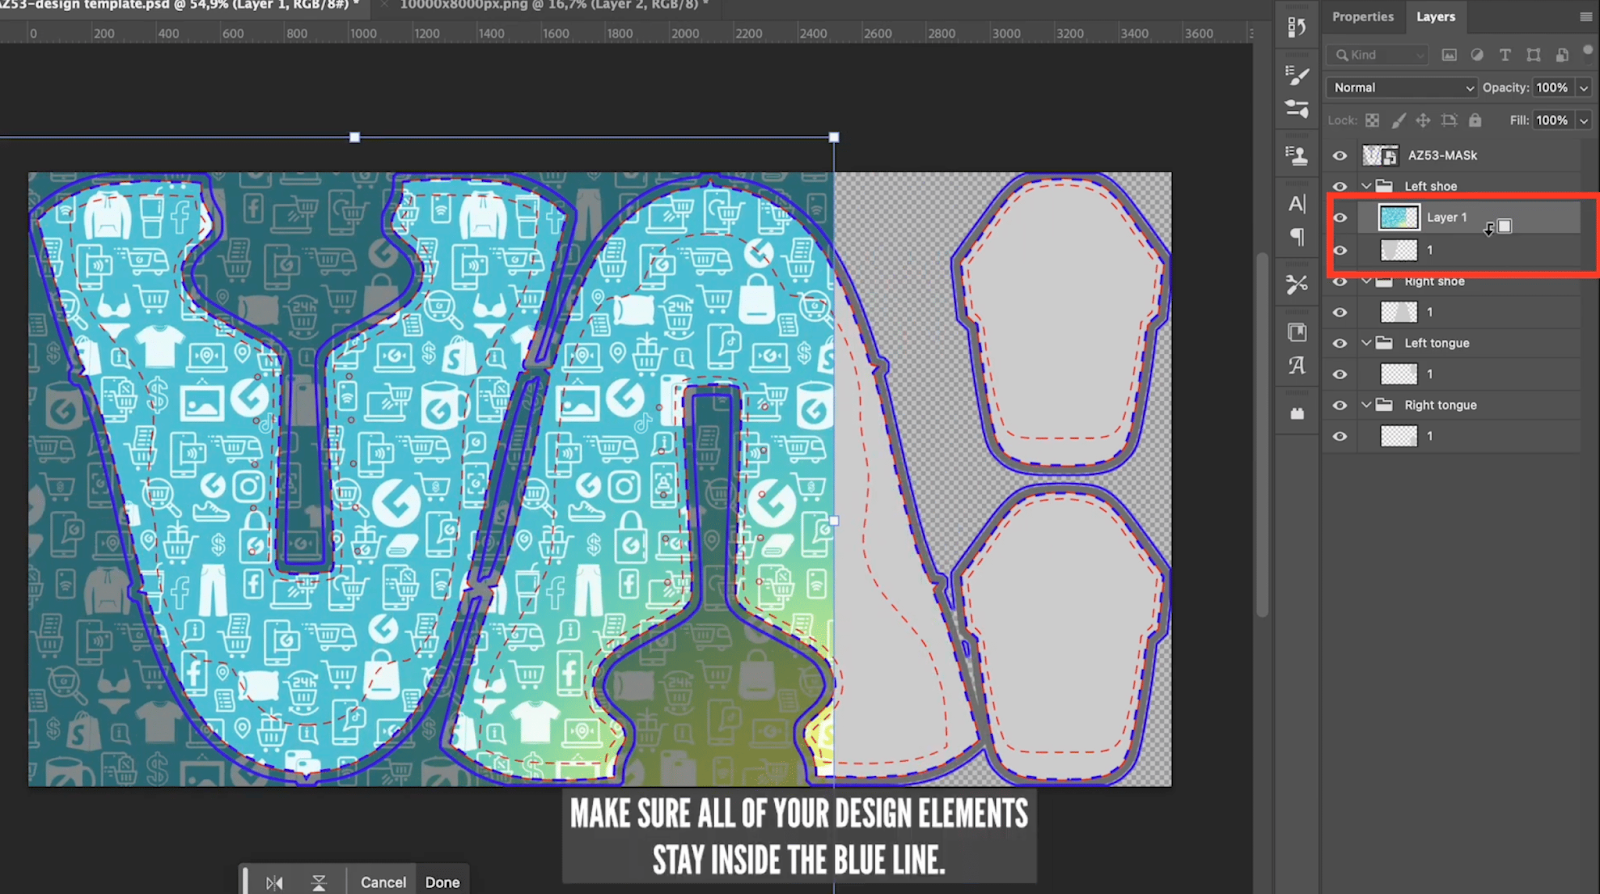
Direction Matters: Consider how your design will look when the product is worn. Sometimes rotating elements or adjusting their orientation makes all the difference in creating a design that flows naturally with the product's shape.
Layer Management: Before finalizing, review each layer to ensure no unwanted elements are visible. A stray guideline or reference mark can ruin an otherwise perfect design.
Your export settings can make or break your final product quality. Here's the professional approach:


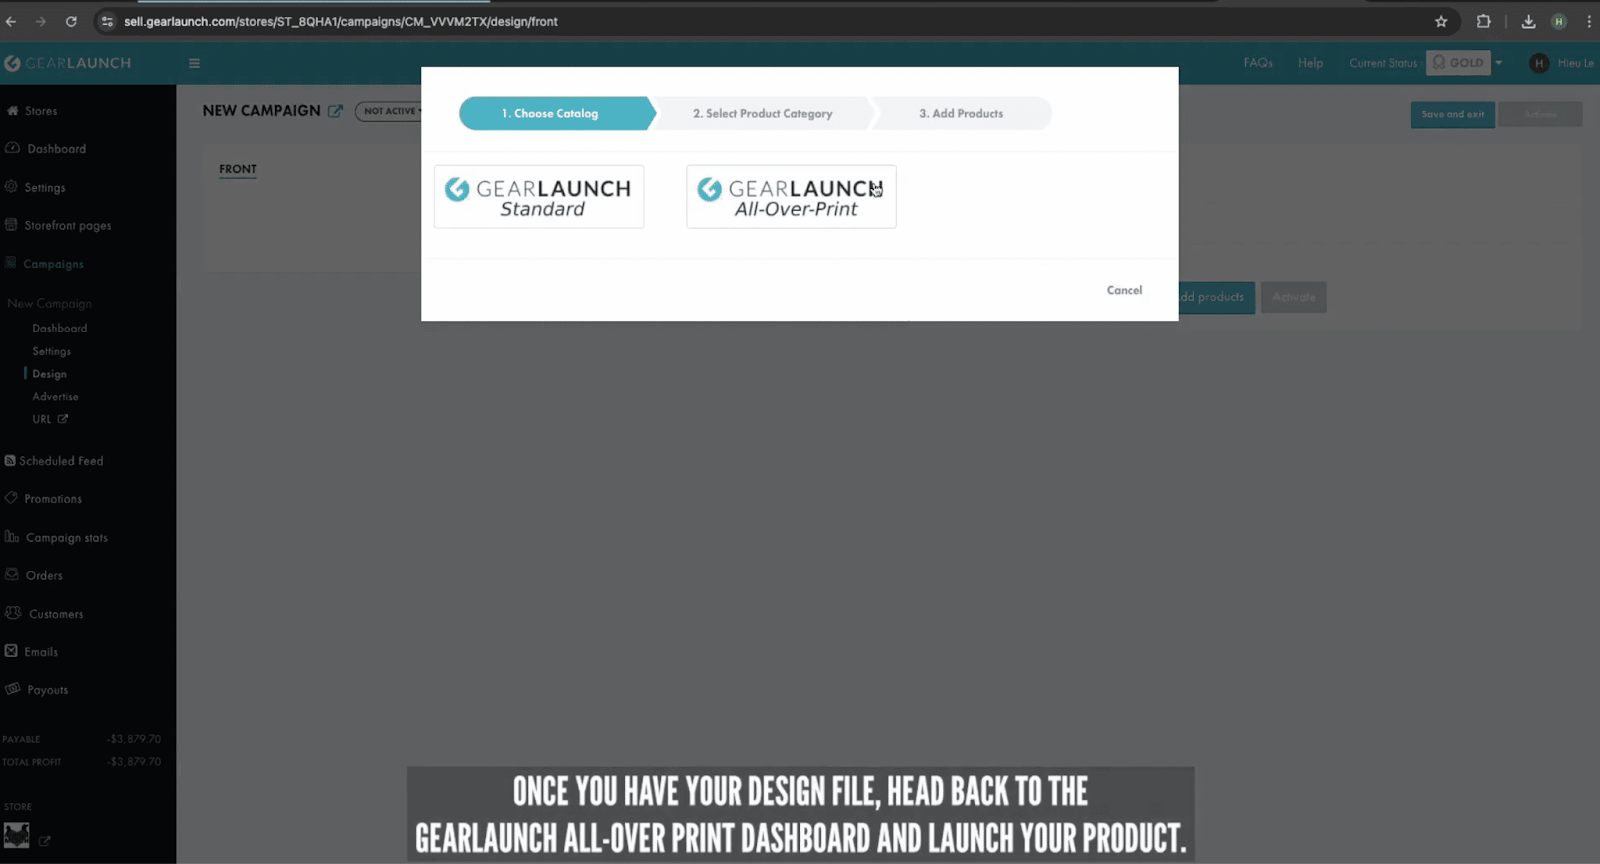
Once you've exported your design file, head back to the GearLaunch all-over print dashboard and launch your product.
As noted in our testing, template-based designs work perfectly with the platform's upload system, ensuring a smooth integration process.
Different colors evoke different emotions and buying behaviors. Consider your target audience when choosing your color palette:

Before creating your design, research what's currently selling in your niche:
Not all products work equally well for all designs. Consider:
Using GearLaunch design templates isn't just about making the design process easier (though it definitely does that). It's about creating products that look professionally made, fit perfectly, and give your customers confidence in their purchase.
When customers receive a product where every element is perfectly placed, colors are vibrant and true, and the overall finish looks polished, they're more likely to:
Remember, in the competitive world of print-on-demand, the details make all the difference. Design templates ensure you get those details right, every time.
The beauty of the print-on-demand business model is that you can test and iterate without huge upfront costs. Start with one template-based design today, follow these guidelines, and watch the difference in your product quality and customer satisfaction.
Have questions about implementing these template strategies? Need help troubleshooting a specific design challenge? Feel free to reach out - I love helping GearLaunch sellers succeed!
Remember: Every successful print-on-demand business started with someone taking that first step toward professional-quality products. Make today the day you level up your game with design templates.
Ready to transform your print-on-demand business? Sign up for GearLaunch today and start creating professional all-over print products that customers love!
P.S. Want more insider tips for growing your print-on-demand business? Follow our blog for weekly insights, case studies, and advanced strategies that successful sellers use to scale their stores.

