Products

.svg)

.svg)

Hey there! I'm Lucy Quach, GearLaunch's Marketing Manager, and I've been helping people start their print-on-demand journey for years. Today, I want to share something super exciting with you - how to create your very first All-Over Print (AOP) campaign on GearLaunch!
Before we dive into the fun stuff, let me quickly explain what AOP is. All-over print is a printing technique that covers the entire surface of a product with your design, creating stunning, vibrant pieces that really stand out from regular printed items.
Think about it - instead of having just a small logo on the front of a t-shirt, your design covers every inch! It's like turning your product into a wearable piece of art.
The first thing I always tell beginners is this: start with a solid foundation. When you log into your GearLaunch dashboard, here's what you need to do:

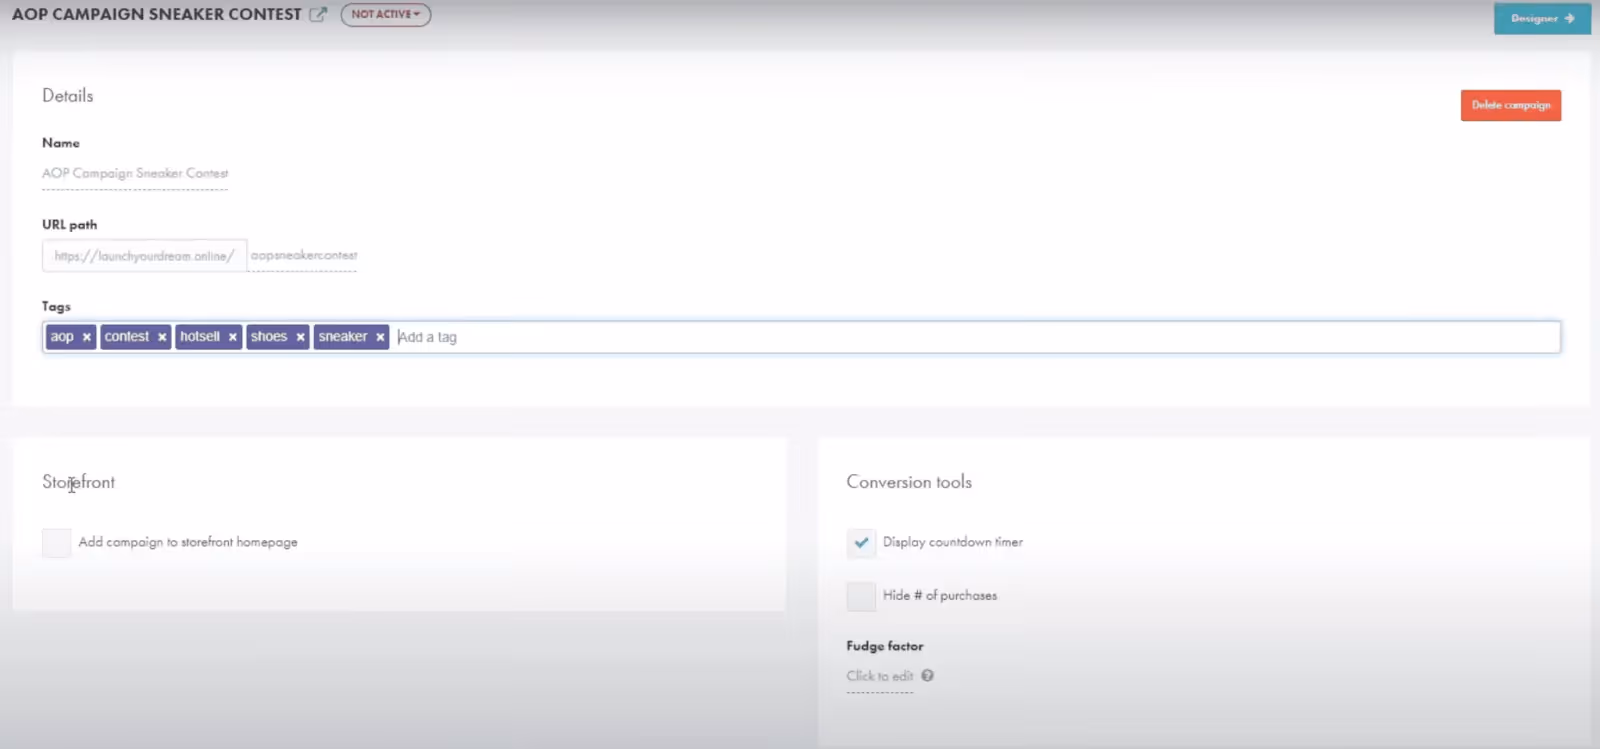
Pro tip from my experience: Don't overthink the name at this stage. You can always change it later, but getting started is more important than finding the "perfect" name!
This is where the magic happens, and honestly, it's my favorite part of the whole process.
Click the "Designer" button and you'll see all of GearLaunch's awesome AOP product options. We're talking hoodies, t-shirts, leggings, and so much more!

Once you've picked your product, click "Customize Product" and you'll have two options:

Here's something really cool about our standard mode - each part of your product is separated into different layers. This means you can be super precise with your design placement.
Here's what you can do:
The Golden Rule: Make sure your design covers the entire design area. I can't stress this enough! If your design covers only a part of the print area, create a transparent background and save it as a PNG file.
Safety First: See those dashed lines on your screen? That's the "safe zone." Keep all your important text and design elements within these lines. Trust me on this - I've seen too many beautiful designs get cropped because someone ignored the safe zone!

Once your design looks amazing (and it will!), here's how to bring it to life:


And just like that, your product will appear on your storefront page! How cool is that?
After helping thousands of people create their first campaigns, here are the mistakes I see most often:
Mistake 1: Not checking the safe zone Solution: Always keep important elements within those dashed lines
Mistake 2: Low-resolution designs Solution: Submit files in PNG or JPEG formats with high resolution
Mistake 3: Rushing the preview step Solution: Always, ALWAYS preview your design before saving
Print on demand allows you to only pay for what you sell, eliminating the risk of buying a large amount of inventory. This means you can test different designs without any upfront costs - pretty awesome, right?
Plus, GearLaunch handles the printing, packing & shipping for you, so you can focus on what you do best - being creative!
Watch full guide video here:
Now that you know how to create your first AOP campaign, here's what I recommend:
Remember, every successful print-on-demand business started with someone clicking "Create Campaign" for the first time. Today could be your day!
Creating your first GearLaunch AOP campaign doesn't have to be scary or complicated. With these steps, you're well on your way to launching something amazing.
Have questions? Need help with your first campaign? Feel free to reach out - I love helping new entrepreneurs start their print-on-demand journey!
Happy designing!
Lucy Quach
Marketing Manager, GearLaunch
LinkedIn
Ready to start your print-on-demand business? Sign up for free and quickly start an online store without inventory at GearLaunch today!


.svg)
.svg)
.svg)